As a mom of three craft loving girls, I know the struggle of wanting a beautifully decorated home without spending a small fortune.
My kitchen table is constantly covered in glitter…honestly, at this point it’s just a permanent decoration.
My craft closet is bursting at the seams, but you know what?
I wouldn’t have it any other way.
You know what I’ve discovered after countless craft store runs and way too many late night Pinterest sessions?
St. Patrick’s Day is actually the perfect holiday for creating gorgeous decor on a tight budget.
And let me tell you…the stuff we’re making looks so good, my neighbors keep asking which boutique I’m shopping at.
Little do they know I’m actually raiding Dollar Tree like it’s my job!
So grab your coffee…or wine, I don’t judge…get comfy, and let me share some of my absolute favorite St. Patrick’s Day crafts that look super expensive but are totally budget friendly.
And yes, I’ve tested every single one of these with my girls, so they’re actually doable…unlike some of those crazy Pinterest fails we’ve all experienced!
Why These Crafts Will Change Your Holiday Game
Listen, I’ve spent more weekends than I can count testing these projects.
We’ve made every mistake possible so you don’t have to!
My dining room table has survived countless craft sessions, and I’ve finally figured out what actually works.
These aren’t those Pinterest projects that look amazing but are impossible to recreate…these are the real deal.
Here’s what makes these projects so special…
- They cost less than $5 each…most are actually under $3…I’m talking cheaper than a fancy coffee
- You probably have most of the supplies hiding in your craft stash already
- They look so expensive that your friends will think you went shopping at those fancy home decor stores
- They’re actually doable for real people with real lives and real kids
- The mess is totally manageable…because nobody needs more cleaning in their life
So let’s jump into these amazing projects…I’m so excited to share these with you!
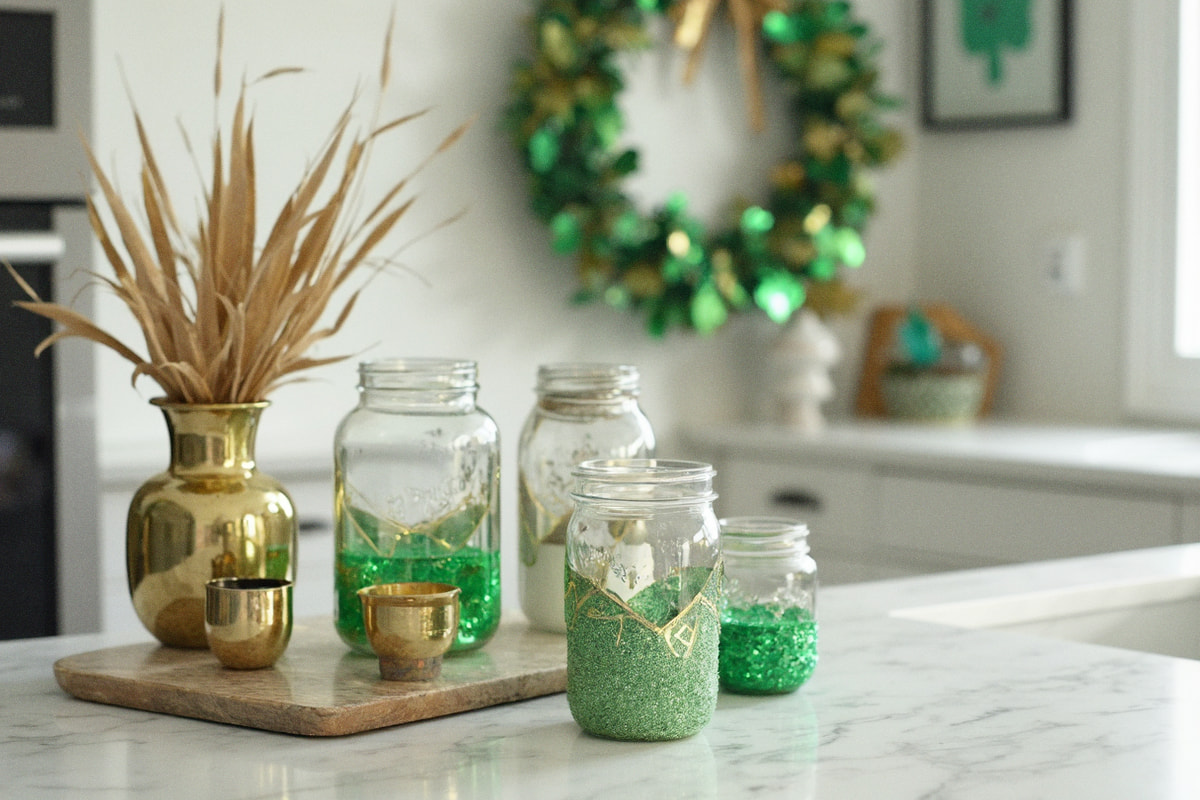
1. Glitter Dipped Mason Jar Luminaries
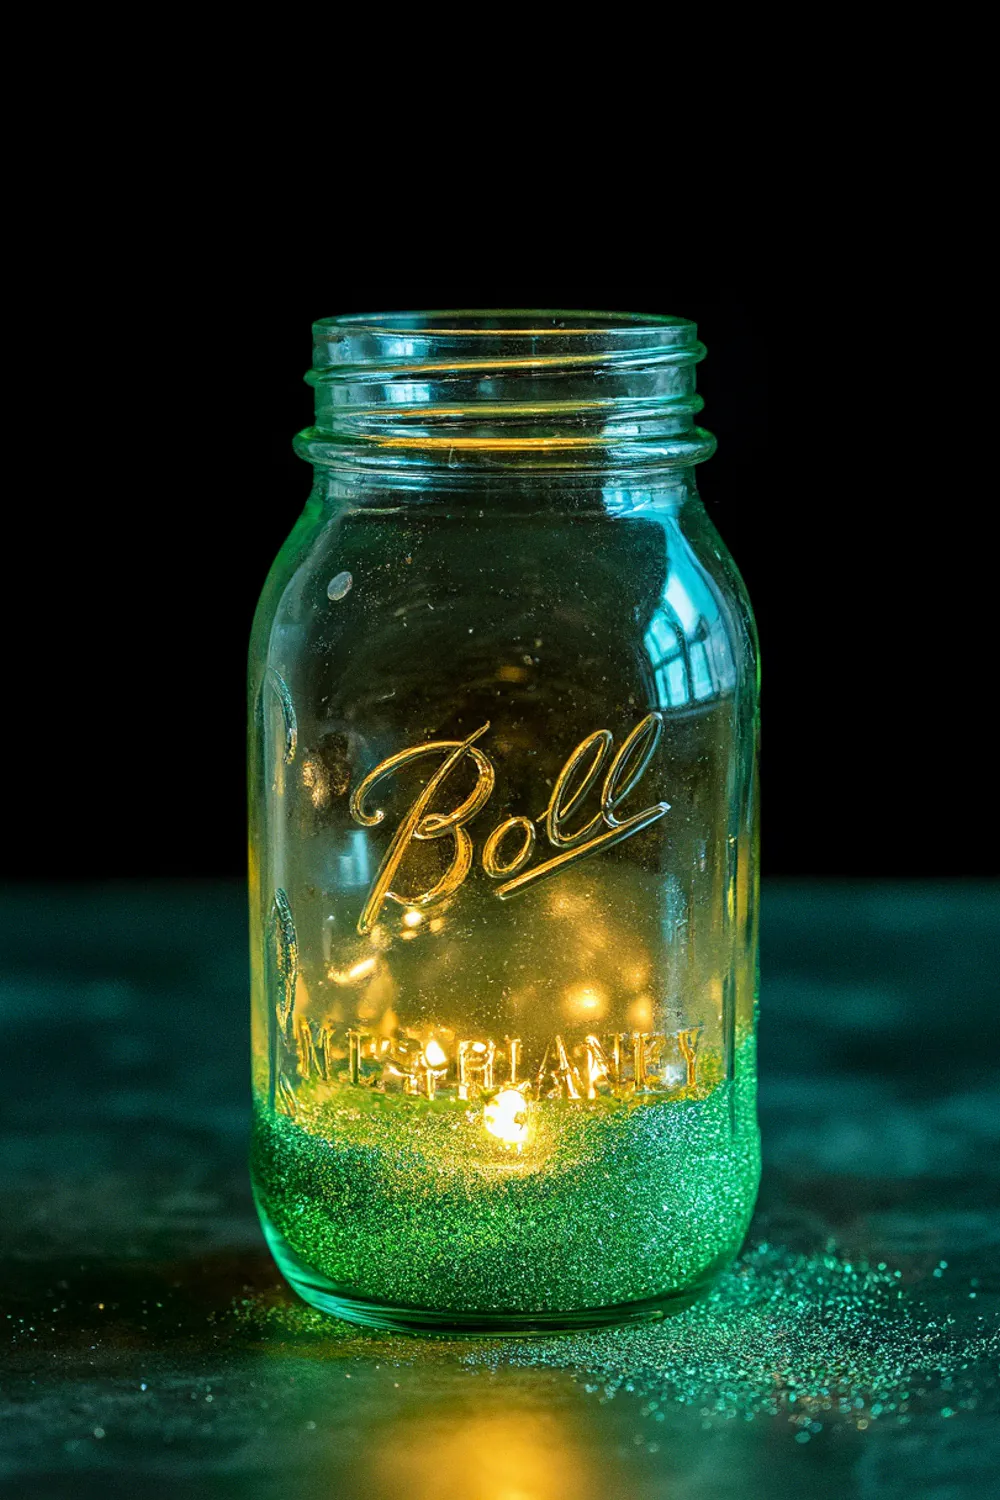
Total Cost: $3 per jar
Okay, let’s start with my absolute favorite. These mason jar luminaries are seriously magical…like, the kind of magical that makes your whole room feel like a fancy restaurant. The first time I made these, I couldn’t stop staring at them. They give off this amazing soft glow that makes everything look prettier.
What you need:
- Mason jars…Dollar Tree is your best friend here
- Mod Podge…the regular kind works fine, no need for fancy versions
- Green glitter…get the fine kind if you can, it looks more expensive
- Battery operated tea lights…trust me, they’re safer than real candles
- Painter’s tape…the blue kind is my favorite
- Foam brush…grab a few, they’re super cheap
Want to know my biggest secret for making these look like they cost big bucks? It’s all about that glitter line. Take your time with the painter’s tape…make sure it’s perfectly straight. I usually have a cup of coffee nearby and make this my quiet morning project when the house is still peaceful. The end result is so worth the extra few minutes of careful taping.
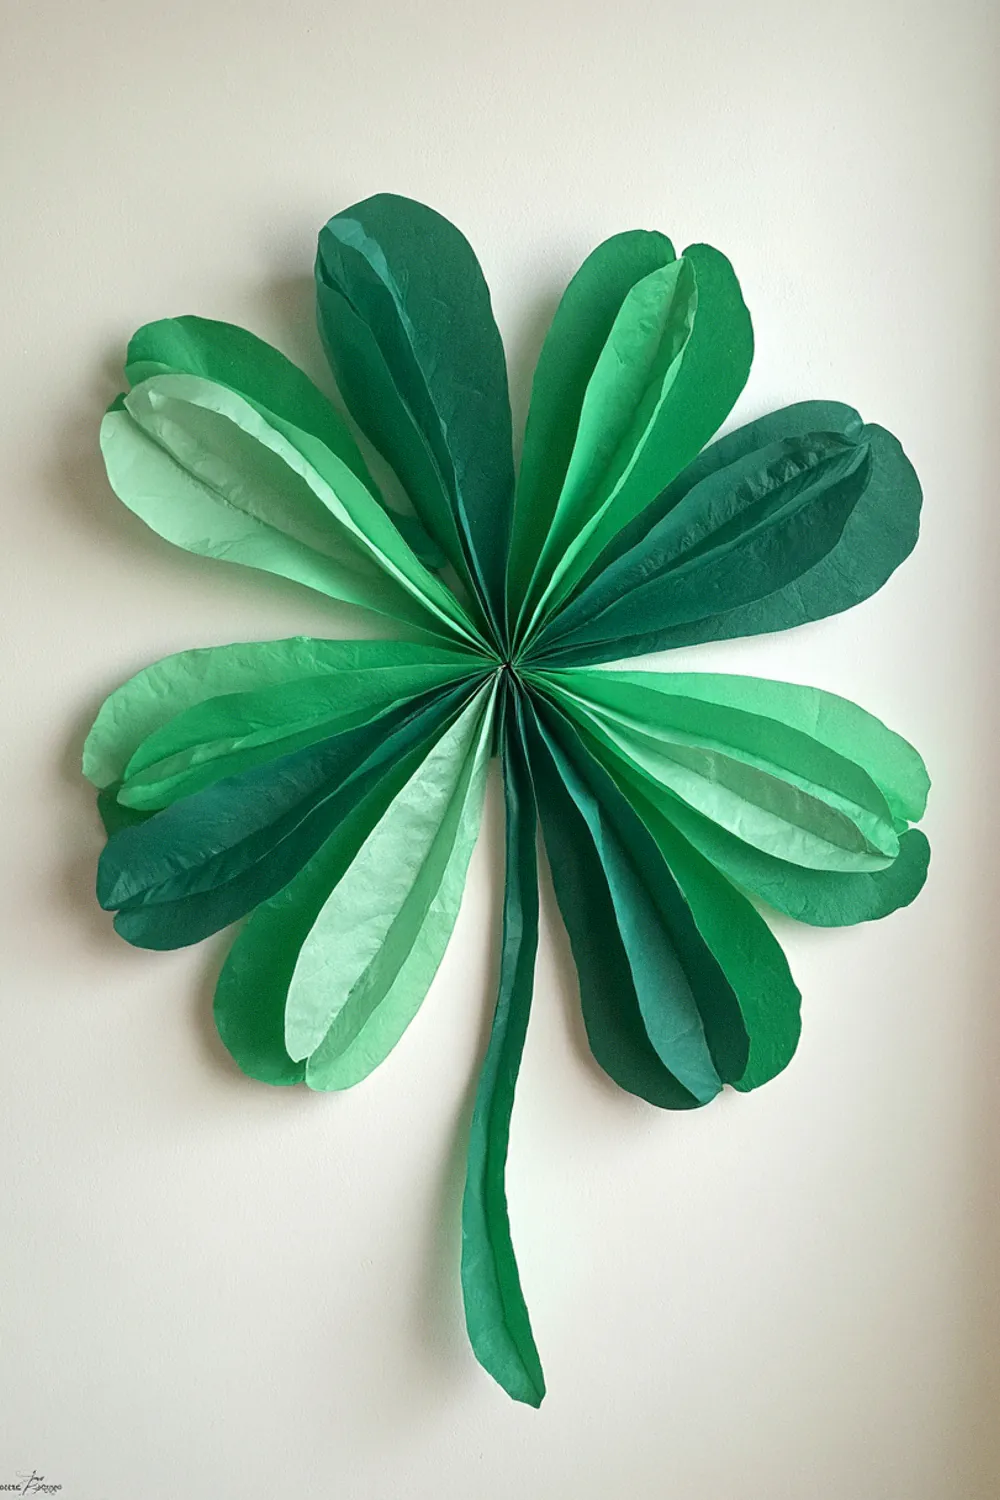
2. Paper Shamrock Wreath
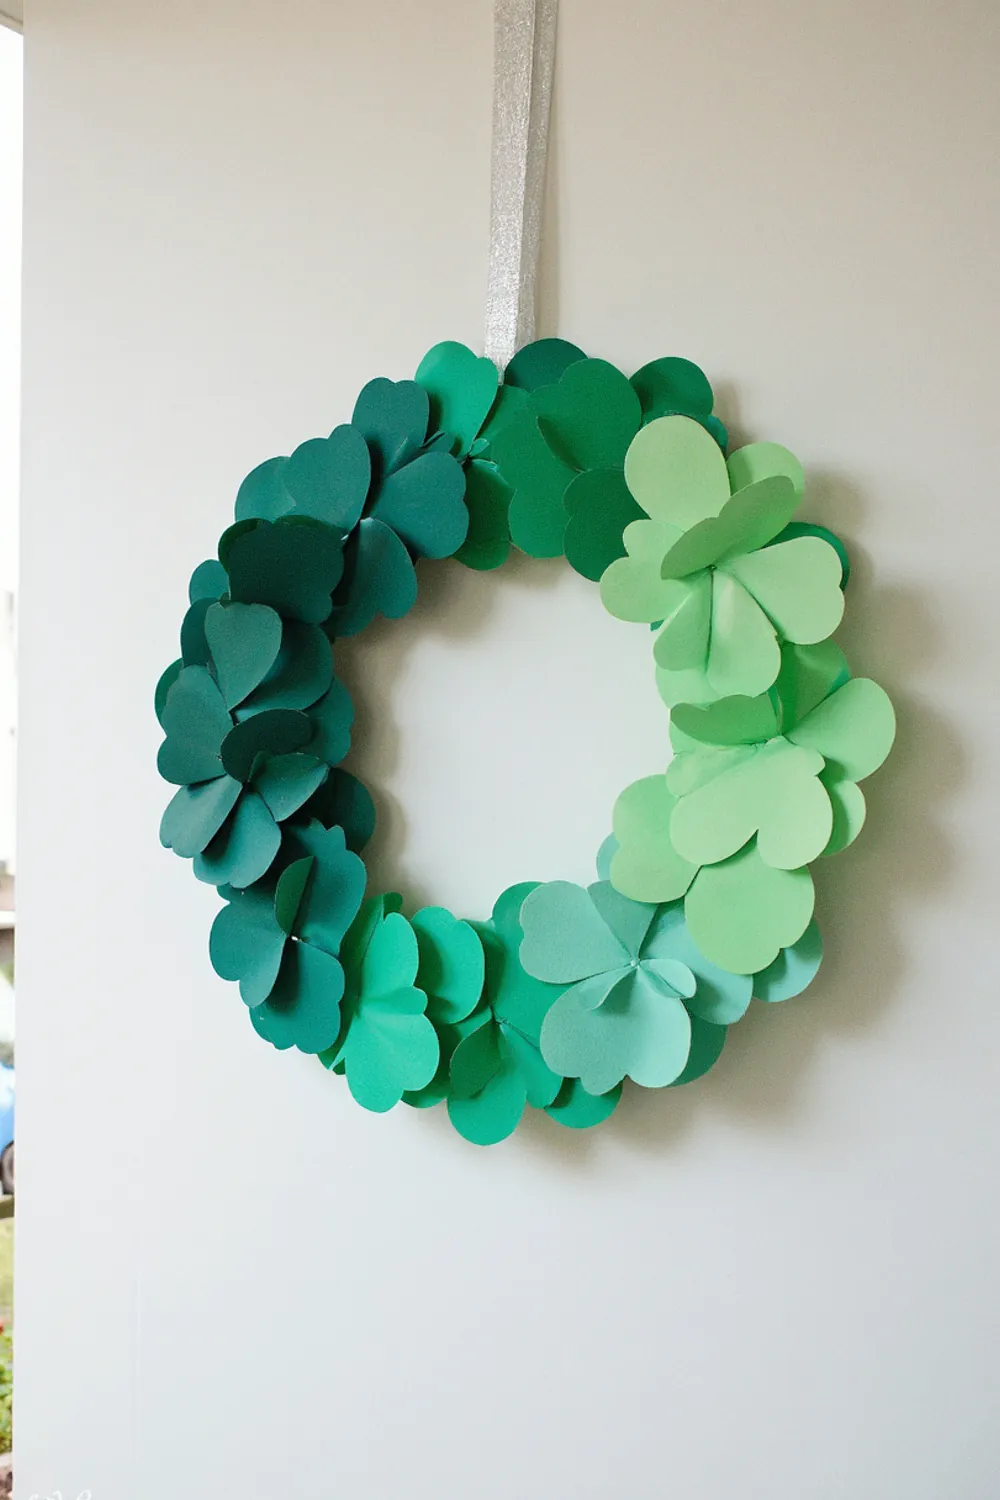
Total Cost: $4
This wreath is my social media superstar…every time I post it, my inbox fills up with messages asking where I bought it. The best part is telling everyone it’s made from plain old paper!
What you need:
- Green cardstock in different shades…lighter and darker greens make it pop
- Foam wreath form…again, Dollar Tree comes through
- Hot glue gun…your crafting best friend
- Scissors…sharp ones make this so much easier
- Ribbon for hanging…pick something pretty, it makes a difference
Let me tell you about the layering technique that makes this look so fancy…Start with your darkest green at the back, then work your way forward with lighter shades. It creates this amazing depth that makes people think you spent way more than four dollars. I usually put on my favorite show and make all the shamrocks while binge watching…it’s actually super relaxing!
3. Rainbow String Art
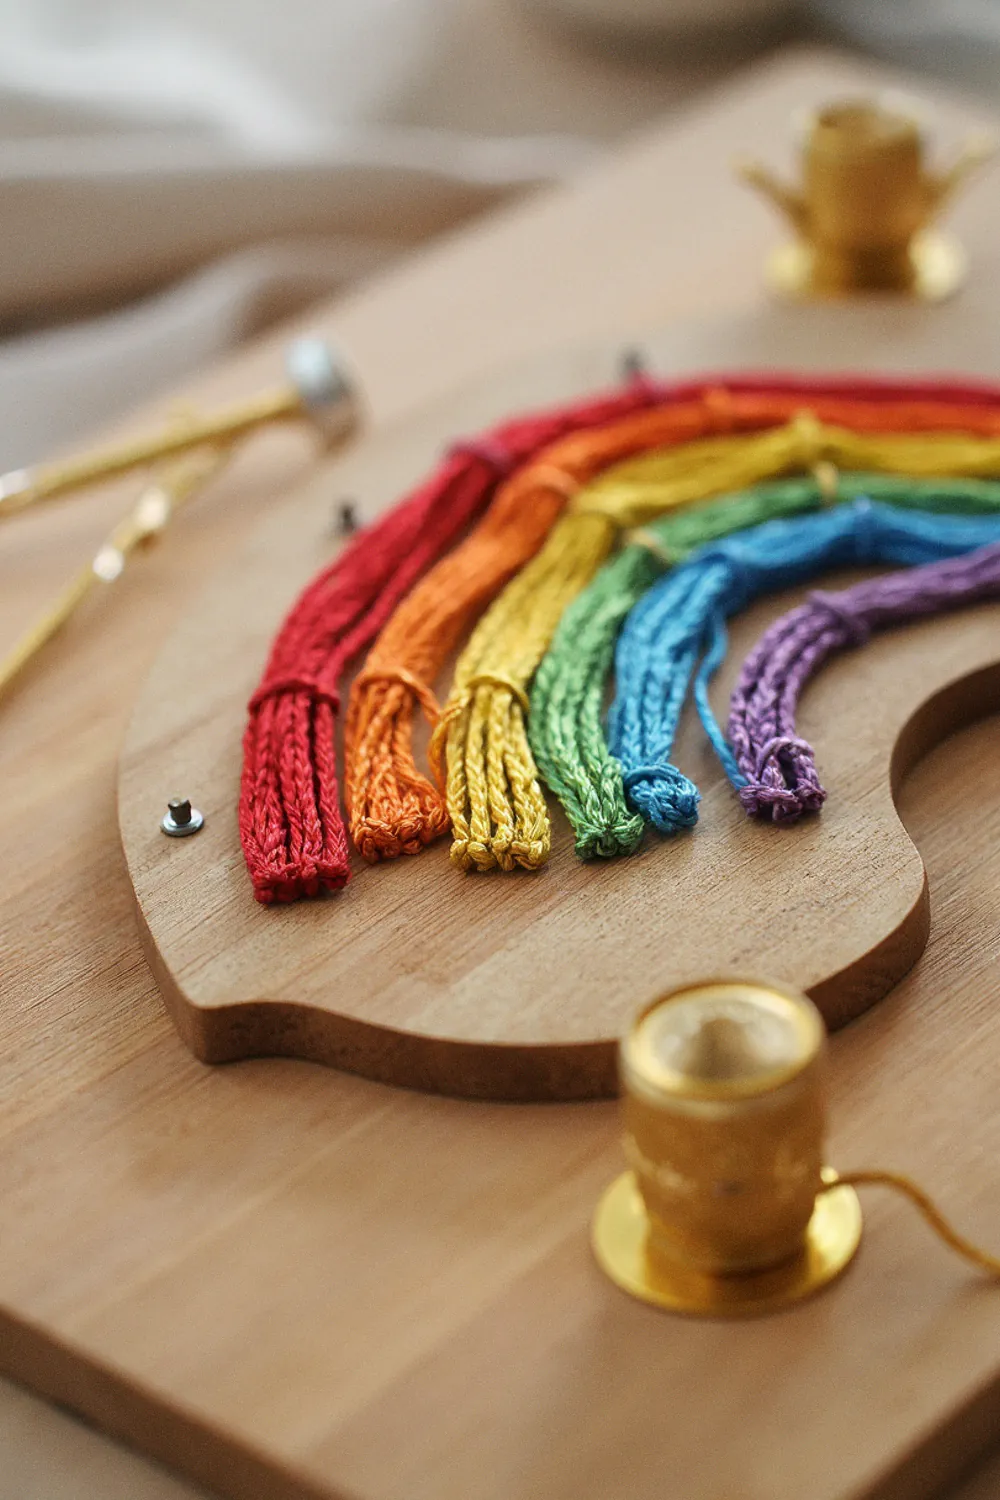
Total Cost: $2.50
Let’s talk about the most relaxing craft ever…I’m not even kidding. There’s something so soothing about wrapping colorful string around nails that just melts the stress away. This is my favorite project to work on after the kids go to bed…just me, some pretty string, and maybe a good podcast.
What you need:
- Small wooden board…Dollar Tree comes through again
- Colored string or embroidery floss…the shinier the better
- Small nails…get the ones with actual heads, trust me on this
- Hammer…time to channel your inner DIY goddess
- Printed rainbow template…I like to make mine extra curvy
Here’s a little trick I discovered after way too many attempts…using metallic gold string for the pot of gold makes this piece look seriously luxe. And don’t worry if your nails aren’t perfectly spaced…I actually think it looks more charming when it’s a tiny bit irregular. Real talk…the first time I made this, my rainbow looked more like a squiggly line, but practice makes perfect!
4. Watercolor Shamrock Art

Total Cost: $2
Can we talk about how therapeutic watercolors are? This project is like art therapy and holiday decorating rolled into one beautiful package. Plus, it’s so pretty that people actually ask if I bought it from an art gallery…seriously!
What you need:
- Watercolor paper…the thick kind if you can swing it
- Green watercolors…any kind works, even the kid ones
- Salt…just regular table salt, nothing fancy
- White crayon…dig through those crayon boxes
- Frame…optional but makes it look super professional
Here’s the magical part that makes everyone go “wow”…draw your shamrocks with the white crayon first. Don’t worry if you can barely see them…that’s actually perfect. Then when you paint over them with watercolors, they appear like magic! Sprinkle some salt while the paint is still wet and watch this gorgeous texture appear. It’s like crafting meets science experiment, and I’m here for it.
5. Sparkly Shamrock Garland
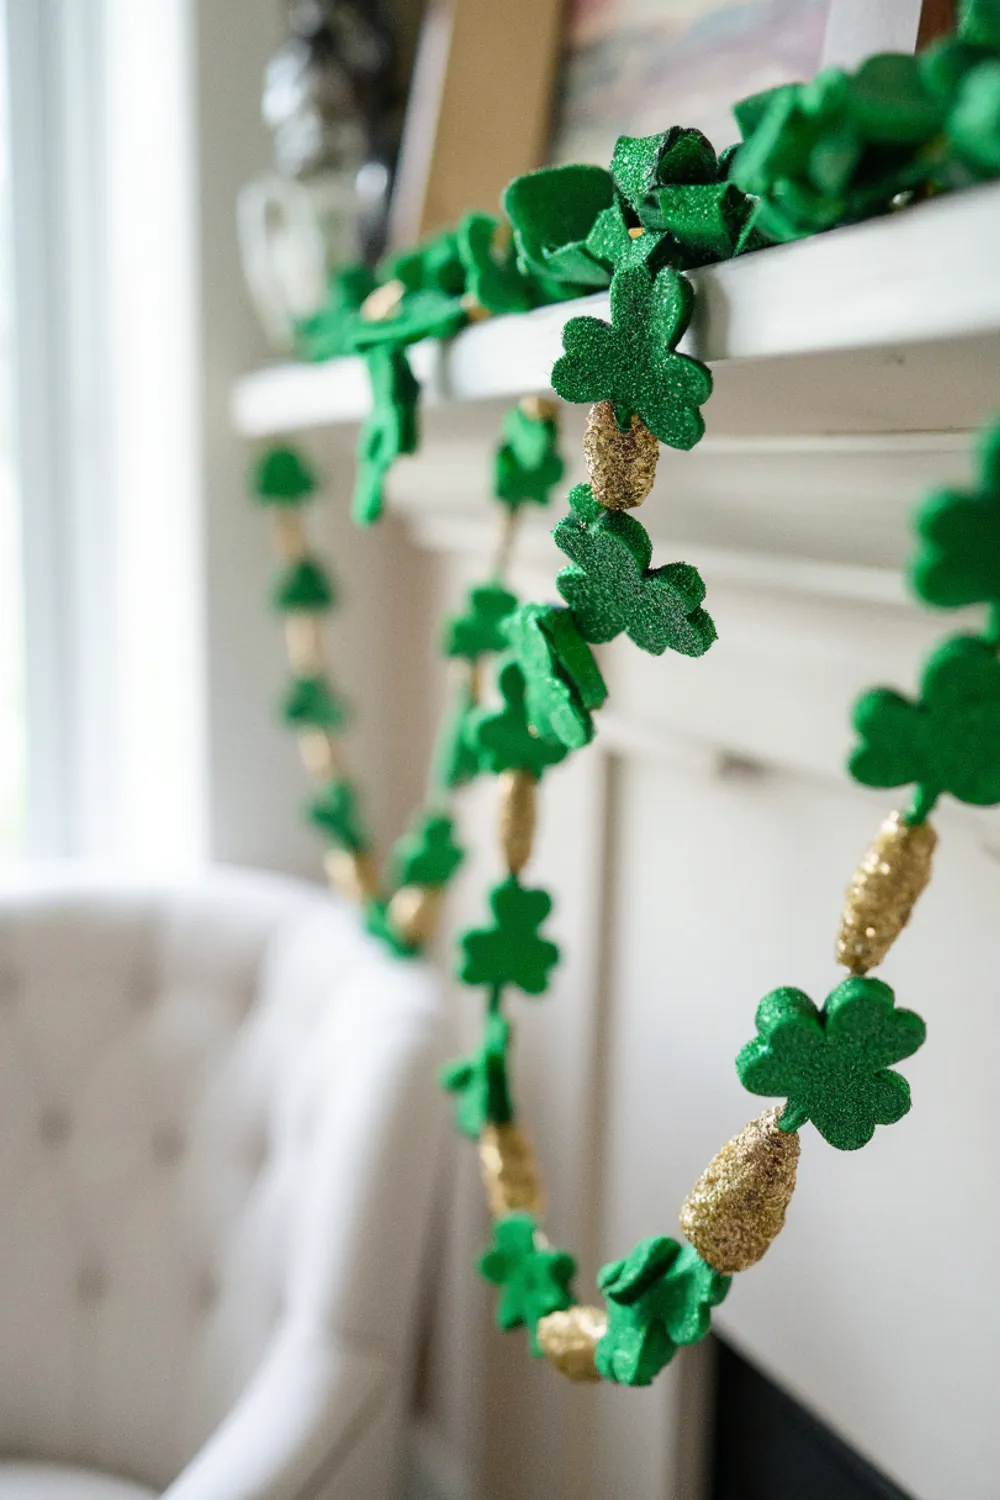
Total Cost: $3
This is what I call my “Netflix and craft” project. You know those evenings when you want to be productive but also really need to find out what happens in your favorite show? This project is perfect for that…easy enough to do while distracted but gorgeous enough to make you feel accomplished.
What you need:
- Green glitter foam sheets…the glitter ones are worth the extra few cents
- Twine…or ribbon, whatever you have around
- Scissors…the sharper the better
- Shamrock template…make a few different sizes
- Hot glue gun…our crafting MVP
The secret to making this look like you bought it at a boutique? Mix up your shamrock sizes and alternate different shades of green. And here’s a little trick…add a few gold ones in there. It takes it from cute to absolutely stunning. I usually make this one way longer than I think I need…it’s perfect for draping everywhere.
6. Rustic Lucky Horseshoe
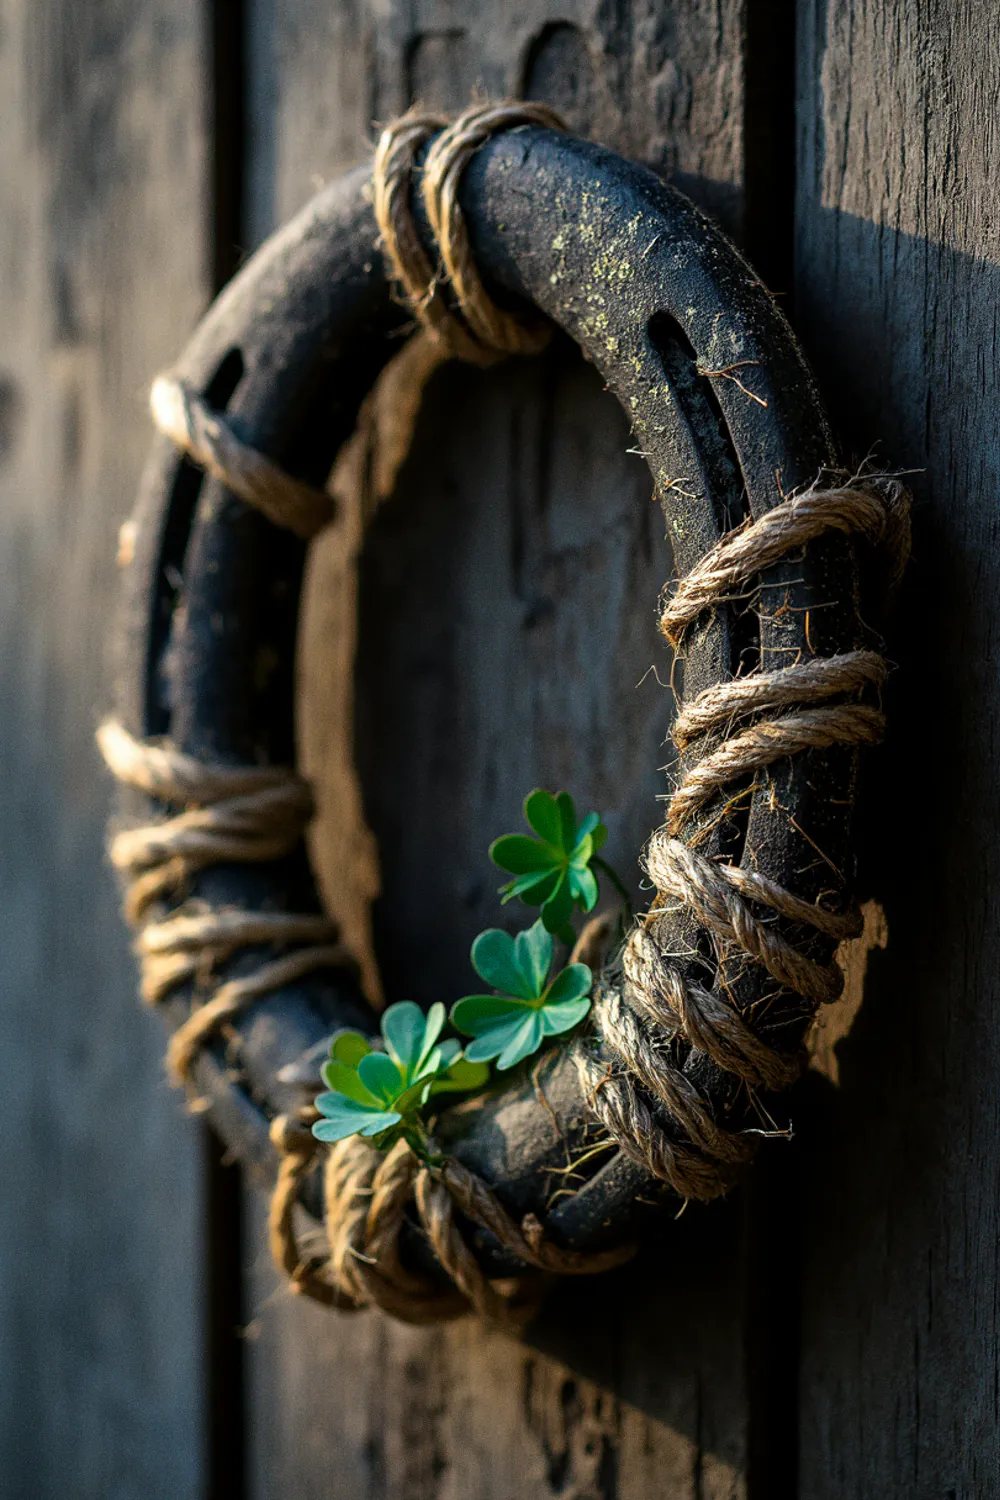
Total Cost: $3.50
Okay, this might be the project that fools everyone…I mean everyone! Every single time someone sees it, they ask which antique store I found it in. When I tell them it’s made from cardboard and twine, they literally don’t believe me. That’s when you know you’ve hit the DIY jackpot!
What you need:
- Cardboard…from any old box you have lying around
- Twine…the rougher looking the better
- Hot glue gun…your trusty sidekick
- Gold spray paint…this is where the magic happens
- Small artificial shamrocks…dollar store finds work perfectly
Let me tell you the secret to making this look authentic…it’s all in how you wrap the twine. Keep it super tight and even. Then just a light…and I mean light…dusting of gold spray paint. It gives it this amazing aged look that’s absolutely perfect. The first time I made this, I got a little excited with the spray paint and it looked like a gold brick…lesson learned!
7. Ombre Tissue Paper Shamrock Art
Total Cost: $2.50
You know those gorgeous pieces you see in home decor stores that cost a ridiculous amount? This looks just like those…but costs less than your morning coffee. It’s actually ridiculous how easy and beautiful this turns out. Every time I make one, people think it’s some fancy art piece!
What you need:
- Canvas board…even the cheap ones work great
- Green tissue paper…get a few different shades
- Mod Podge…our faithful friend
- Foam brush…grab a fresh one
- Shamrock template…size it to your canvas
The ombre effect is what makes this piece look so expensive, and it’s way easier than you’d think. Just layer your tissue paper from dark to light green. The trick is to embrace the wrinkles…they add texture and make it look so artistic. Sometimes I’ll be working on one of these while helping with homework, and honestly…the more distracted I am, the better it turns out!
8. Gold Dipped Painted Vases
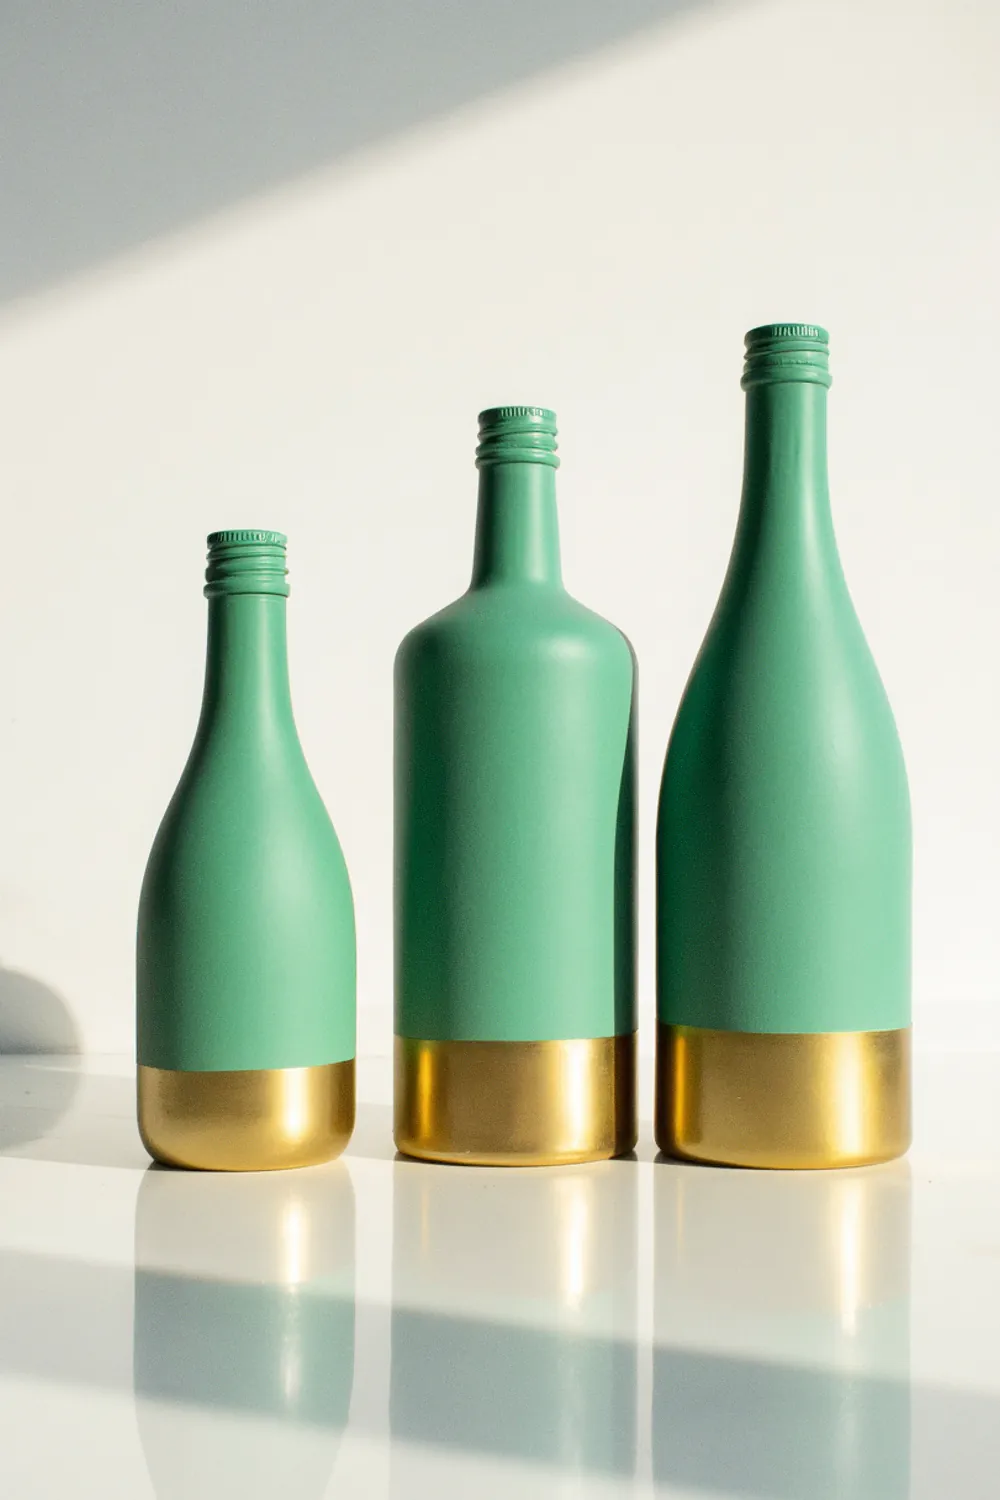
Total Cost: $4
Remember all those glass bottles you were going to recycle? Time to rescue them from the bin because we’re about to turn them into something amazing. These vases look so high end, you’ll want to keep them out year round…which I totally do, by the way!
What you need:
- Glass bottles or vases…wine bottles work great, just saying
- Green chalk paint…makes such a pretty matte finish
- Gold acrylic paint…get the good stuff for this part
- Painter’s tape…your best friend for clean lines
- Foam brushes…fresh ones for each color
Here’s what makes these look expensive…patience with those paint lines. Take your time with the tape, make sure it’s super straight, and wait for each layer to dry completely. I learned this the hard way after trying to rush it once…ended up with green and gold fingers for days! But when you do it right…wow. Just wow.
9. Lucky Penny Art
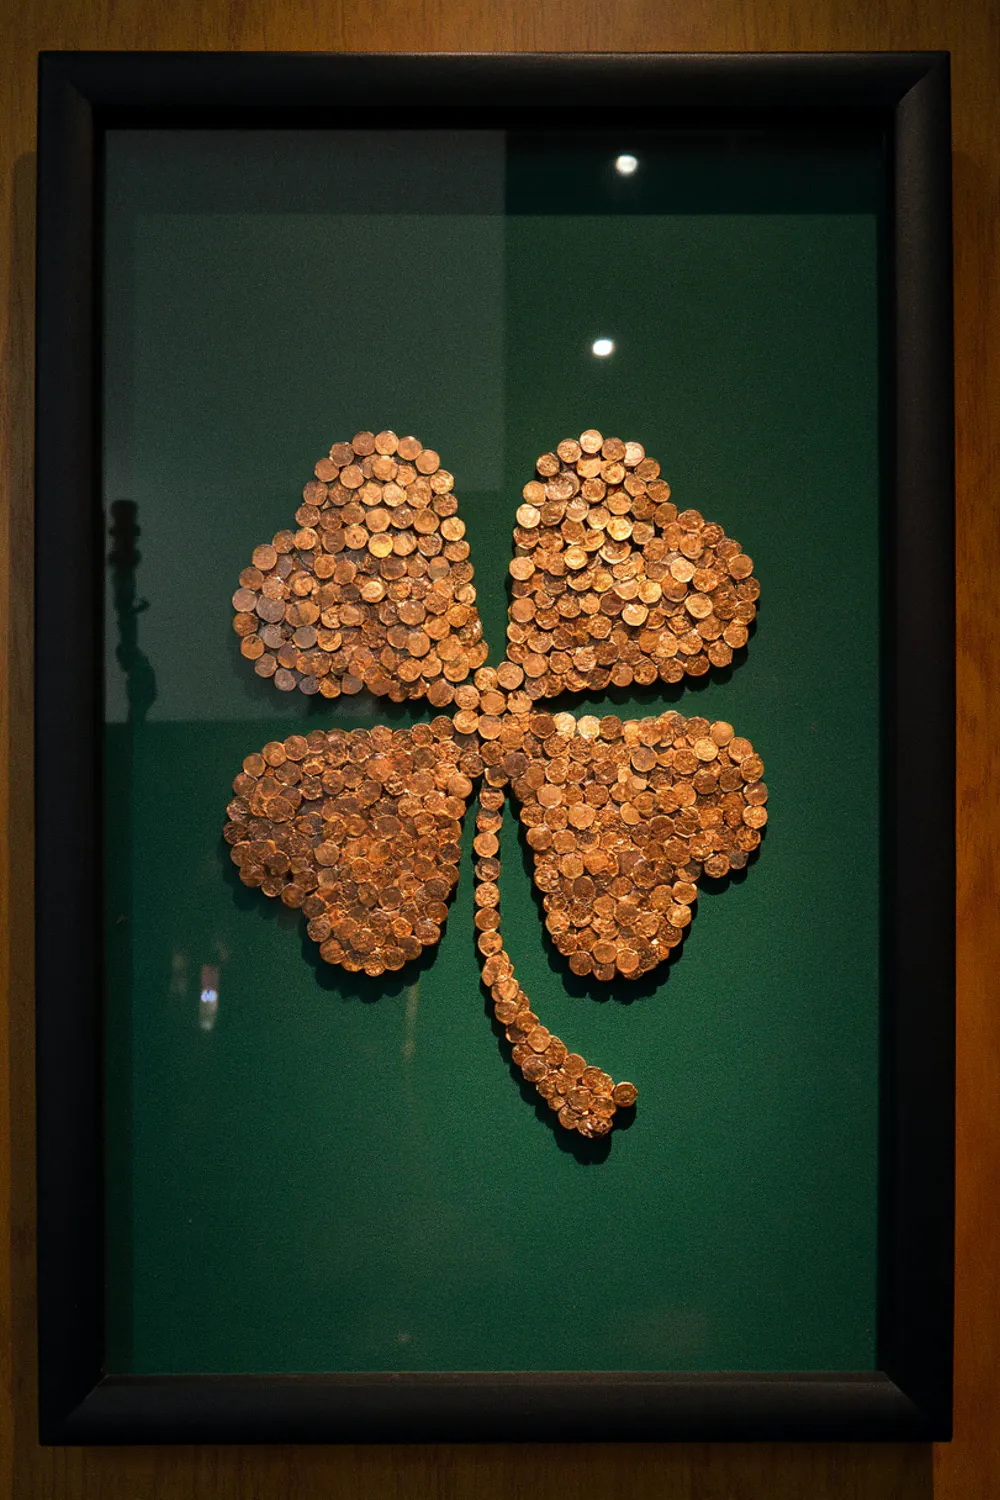
Total Cost: $2
Who knew that spare change could look this good? This project literally turns coins into art, and it’s so satisfying to make. Plus, it’s a great way to use up all those pennies sitting in your change jar…you know, the one that’s been getting heavier for years!
What you need:
- Frame with backing…thrift stores are great for this
- Pennies…the more tarnished the better
- Hot glue gun…our trusty friend
- Green felt…for the background
- Four leaf clover template…make it big and bold
Want to know what makes this piece really pop? Clean those pennies until they shine using vinegar and salt…it’s like a science experiment and craft project in one! The contrast between the copper and green felt is absolutely stunning. And honestly? The more random the penny placement, the more artistic it looks. My youngest helped me with this one and her “creative” placement actually made it look even better!
10. Shamrock String Light Covers

Total Cost: $3
Last but definitely not least…these light covers transform any basic string lights into something magical. They give off the prettiest glow and create these amazing shadows on your walls. It’s like having your own little Irish fairy lights!
What you need:
- Green paper cups…Dollar Tree is your friend
- Scissors…sharp ones make all the difference
- Shamrock template…sized to your cups
- String lights…warm white looks best
- Hole punch…makes everything neater
I know cutting paper cups sounds kind of weird, but trust me on this one.
When the lights shine through the shamrock cutouts, it creates this gorgeous effect that looks way more expensive than it is.
And here’s a tip…save one cup to practice on first. Once you get your technique down, the rest are super easy.
I usually make these while watching TV…it’s the perfect mindless crafting project!
Final Thoughts
You know what makes me happiest about all these projects? It’s not just that they look amazing without costing a fortune…though that’s pretty awesome.
It’s the joy of creating something beautiful with your own hands…and maybe making a bit of a mess along the way!
Every time someone compliments these decorations, I get this little burst of pride knowing I made them myself.
Some of my favorite pieces aren’t even the perfect ones…they’re the ones where something went a little wonky but ended up looking even better.
Crafting isn’t about perfection…it’s about having fun, being creative, and maybe ending up with some glitter in your hair…and on your face…and somehow in the kitchen.
Every project can be made your own way…that’s the beauty of DIY decorating.
Tag your photos on social media and spread the crafty love around.
And if you get glitter everywhere or your first attempt isn’t perfect…welcome to the club!